
This article describes how to create templates for Windows desktops that use Entra ID-only authentication instead of the more typical Active Directory authentication.
Prerequisites
Control should be configured for Entra ID (Azure AD) authentication for both Desktop and Clients (“Entra ID only”).
This document only focuses on the steps to enable Entra ID authentication on the Desktops. See Configuring an Entra-ID-Only (Azure-AD-Only) Control Account for other aspects of this feature.
Configuration Process
Log in to the draft-mode template and complete all the regular template configuration, such as Installing applications.
If it is a custom template, make sure you install the latest Workspot Desktop Agent.
As a first step, open the Microsoft Store and Search for “Windows Configuration Designer” and click on GET button. This will download and configure the WCD automatically. No further action is needed to install it.

Open file explorer and navigate to
C:\Program Files\WindowsAppsand you should find three folders with names staring with “Microsoft. WindowsConfigurationDesigner.”
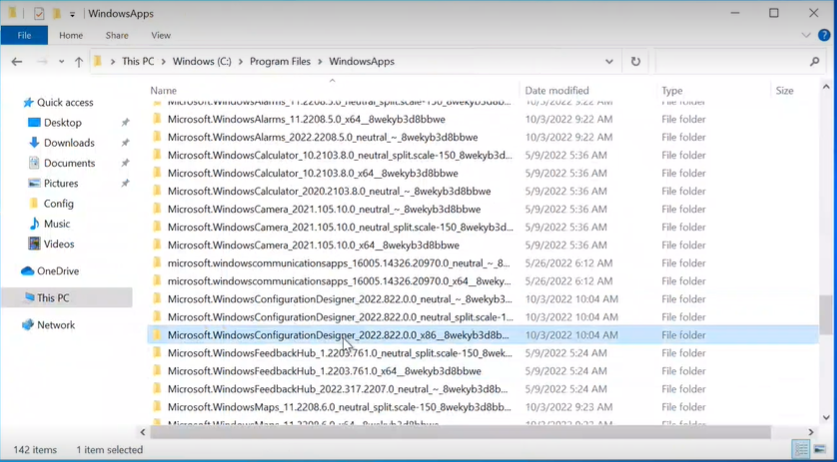
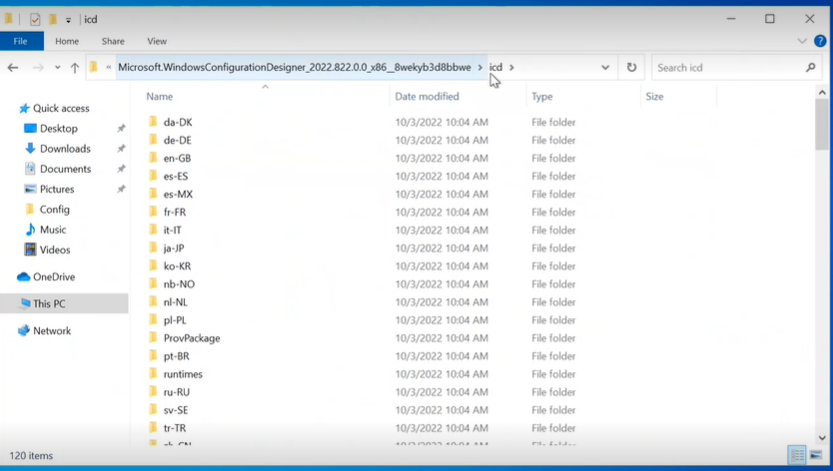
Open the last folder and locate “icd” subfolder, open it, and copy the full path of the icd folder.
“Open Start > System” and search for “Environment Variables” for your account

In the list of “System Variables,” double-click on “Path.”
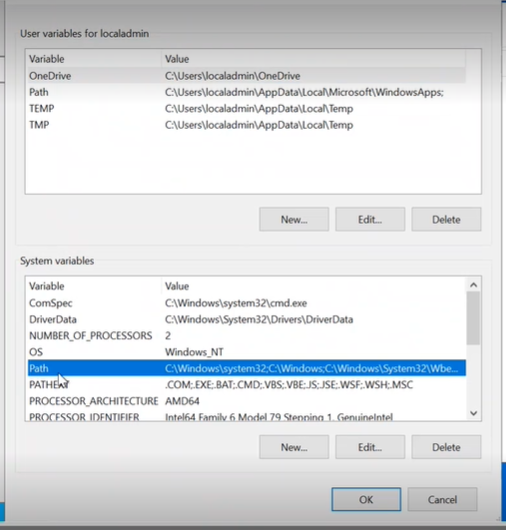
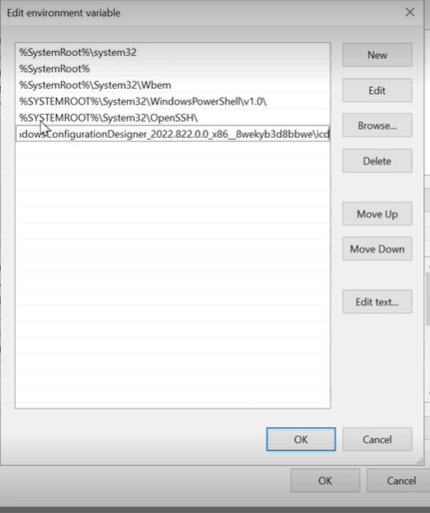
Add the icd folder path to the bottom of the Path list as follows:
a. Click on “New” to add a new row.
b. Paste the folder path into the new row.
c. Click “OK.”
Make sure the Agent’s
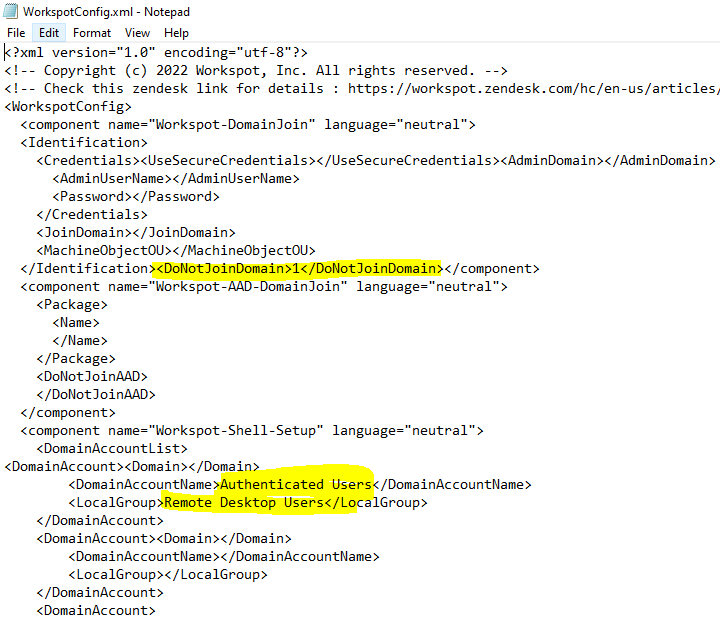
WokspotConfig.xmllocated in “C:\ProgramData\workspotagent\Config” is properly configured. In case the WorkspotConfig.xml file does not exist, copy the file from “C:\Program Files\WorkspotAgent” to “C:\ProgramData\WorkspotAgent\Config.Make sure the “DoNotJoinAD” section is set to 1 as highlighted below.
To enable user connections on the VM, add the local group “Authenticated Users” to the “Remote Desktop Users” group
If you wish to give Admin access to the users, also add the “Authenticated Users” group to the “Administrators” group.
The Template configuration is now complete. Move the template status to “Preview” and test the deployment before publishing it.